After completing this session, you will be able to:
Make a new branch on a GitHub repository
Create a Quarto website
Define “deploy” in the context of Quarto websites
Describe the purpose of GitHub Actions (GHAs)
Use a GHA to deploy a Quarto website
Create a new page for an existing Quarto website
Identify components of SCSS stylesheets
Describe key code syntax differences between SCSS and R code
Use SCSS stylesheets to customize a deployed Quarto website
NoteAcknowledgments
Much of this page was adapted from the Long Term Ecological Research (LTER) Network’s workshop “Creating Websites with Quarto”. Those materials can be found at lter.github.io/workshop-quarto
1 Overview
Quarto is a popular tool for making easily customizable websites and these sites can be hosted through GitHub without much additional effort. These websites are free and can be a (relatively) easy way of making a central home for a given project to share core information with external partners. The goal of this lesson is to get you started by working through the fundamental setup steps of creating your own Quarto website. This topic has a lot of depth so we won’t be able to cover everything today, but hopefully it is still a useful primer on this topic!
2 Make the Website’s GitHub Repository
From your GitHub “Repositories” tab, click the “New” button.
In the resulting page, do all of the following
Name the repository
Add a (short) description
Make it Public
Only public repositories can support websites
Click the toggle to include a README
Add the R template for the .gitignore
Consider whether you want to add a LICENSE
Useful if you want to make sure visitors to your website have guidelines on how they’re allowed to use the content there
2.1 Repository Name & Website URL Aside
The name you pick for your repository (and whose GitHub account owns that repository) determines the URL for the website hosted there! See below for some examples.
So, think about a repository name that will make your URL informative without being overly long if someone needs to type it manually.
WarningRepository Name-URL Exception
There is one critical exception to the above rule for how the website URL is related to the GitHub repository’s name! If the repository name is “owner.github.io” then that will also be the URL for the website (i.e., the “owner” part gets dropped from the URL to simplify things). See below for some examples.
GitHub branches are typically short-lived development spaces that operate parallel to the ‘main’ branch of a repository. The main branch is either called “main” or (for older repositories) “master.” If you don’t think you’ve used branches so far, you’re mistaken! All repositories have at least the main branch by default.
Deploying a Quarto website requires you make a branch named exactly “gh-pages”. We will never have to directly work in that branch but GitHub will use it behind-the-scenes to host the website. We could make this branch later, but let’s go ahead and do so now while we’re here.
3.1 Check the Active Branches
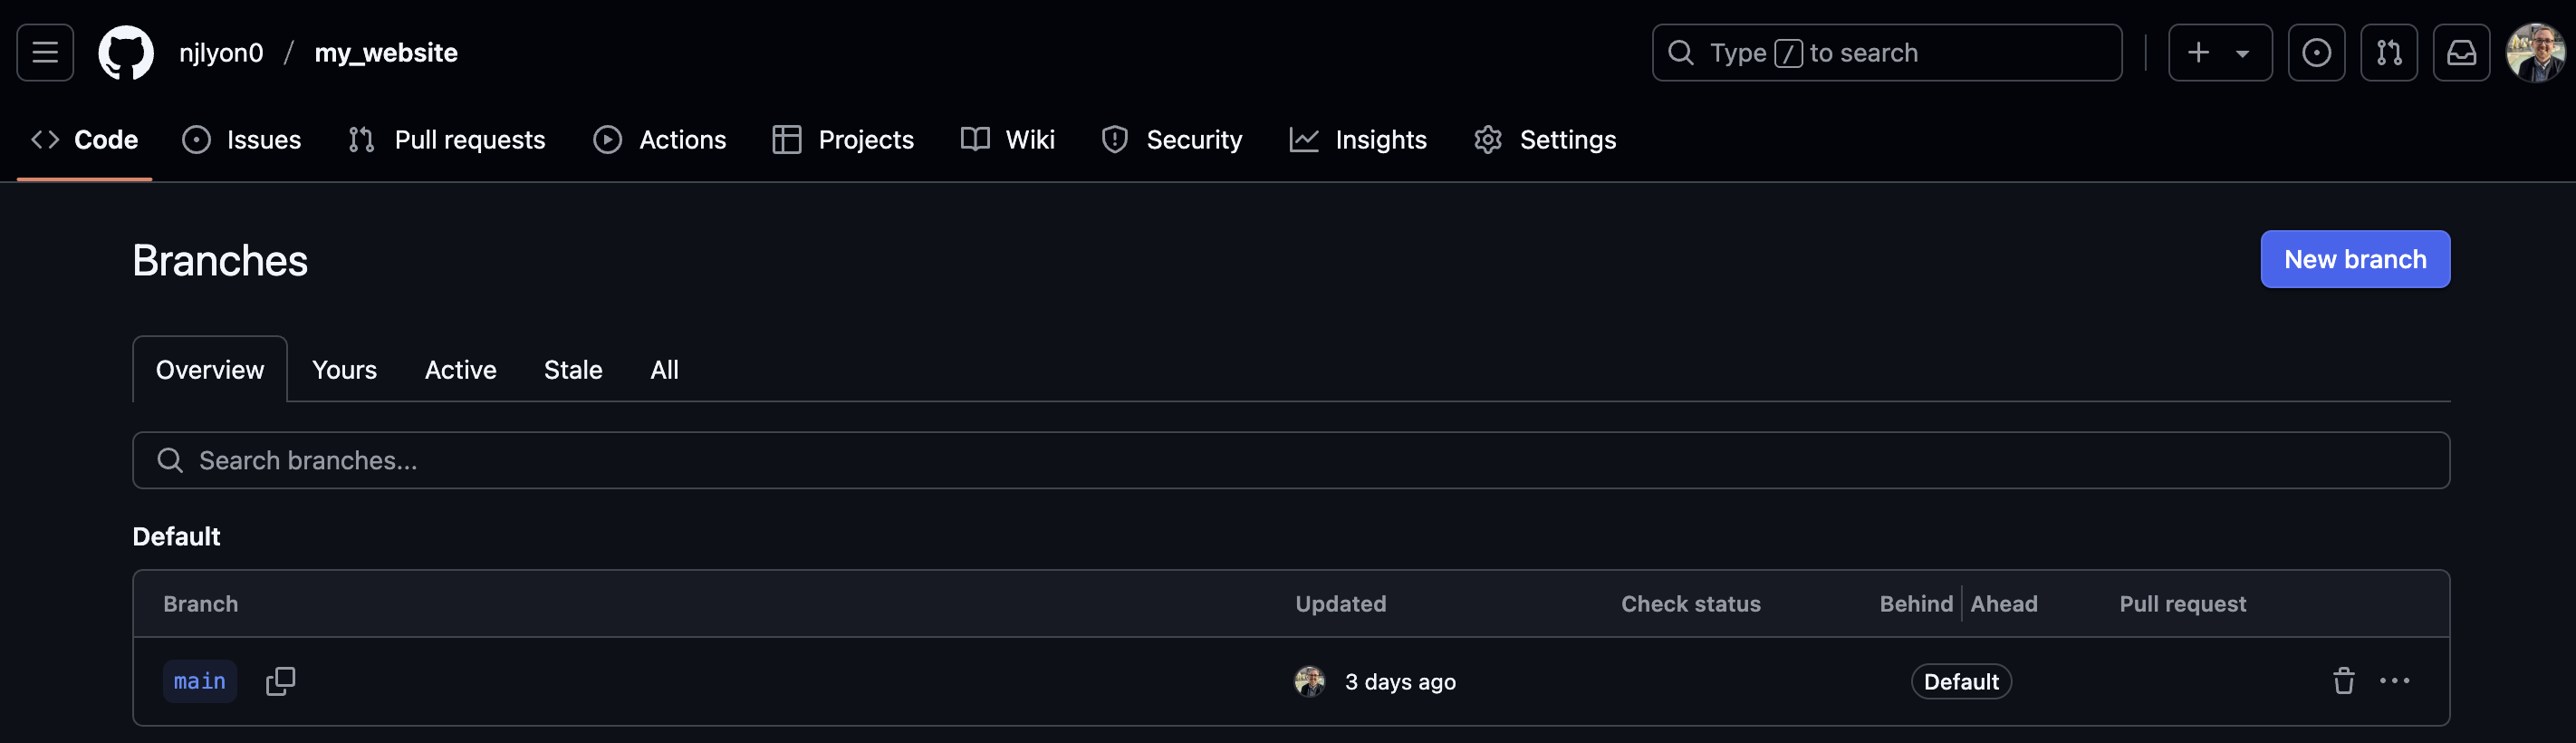
From your repository’s home page, click the “ 1 Branch” button. It is on the left side of the same row of buttons as the “Code” button. Note that you can see your current branch name (likely “main”) just to the left of the desired button.
3.2 Start Creating a New Branch
In the resulting page, click the “New Branch” button in the top right corner.
3.3 Actually Create the “gh-pages” Branch
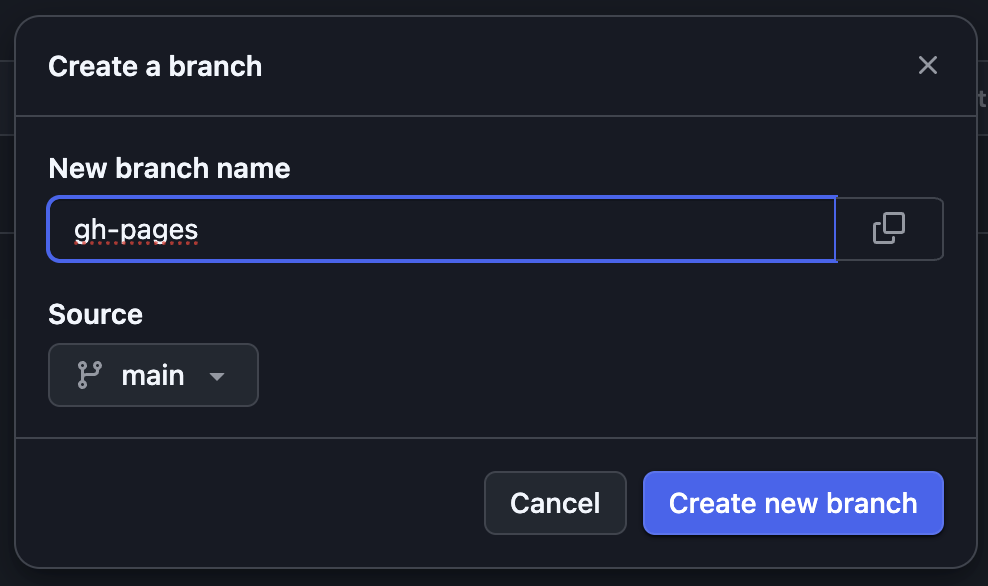
The previous step will create a small pop-up window with an empty text field for you to enter the name of your branch. Type exactly “gh-pages” and click “Create new branch”. Note that “gh” and “pages” are separated by a hyphen. If you name this branch anything other than “gh-pages”, GitHub will not correctly host your website! So, triple check spelling/casing.
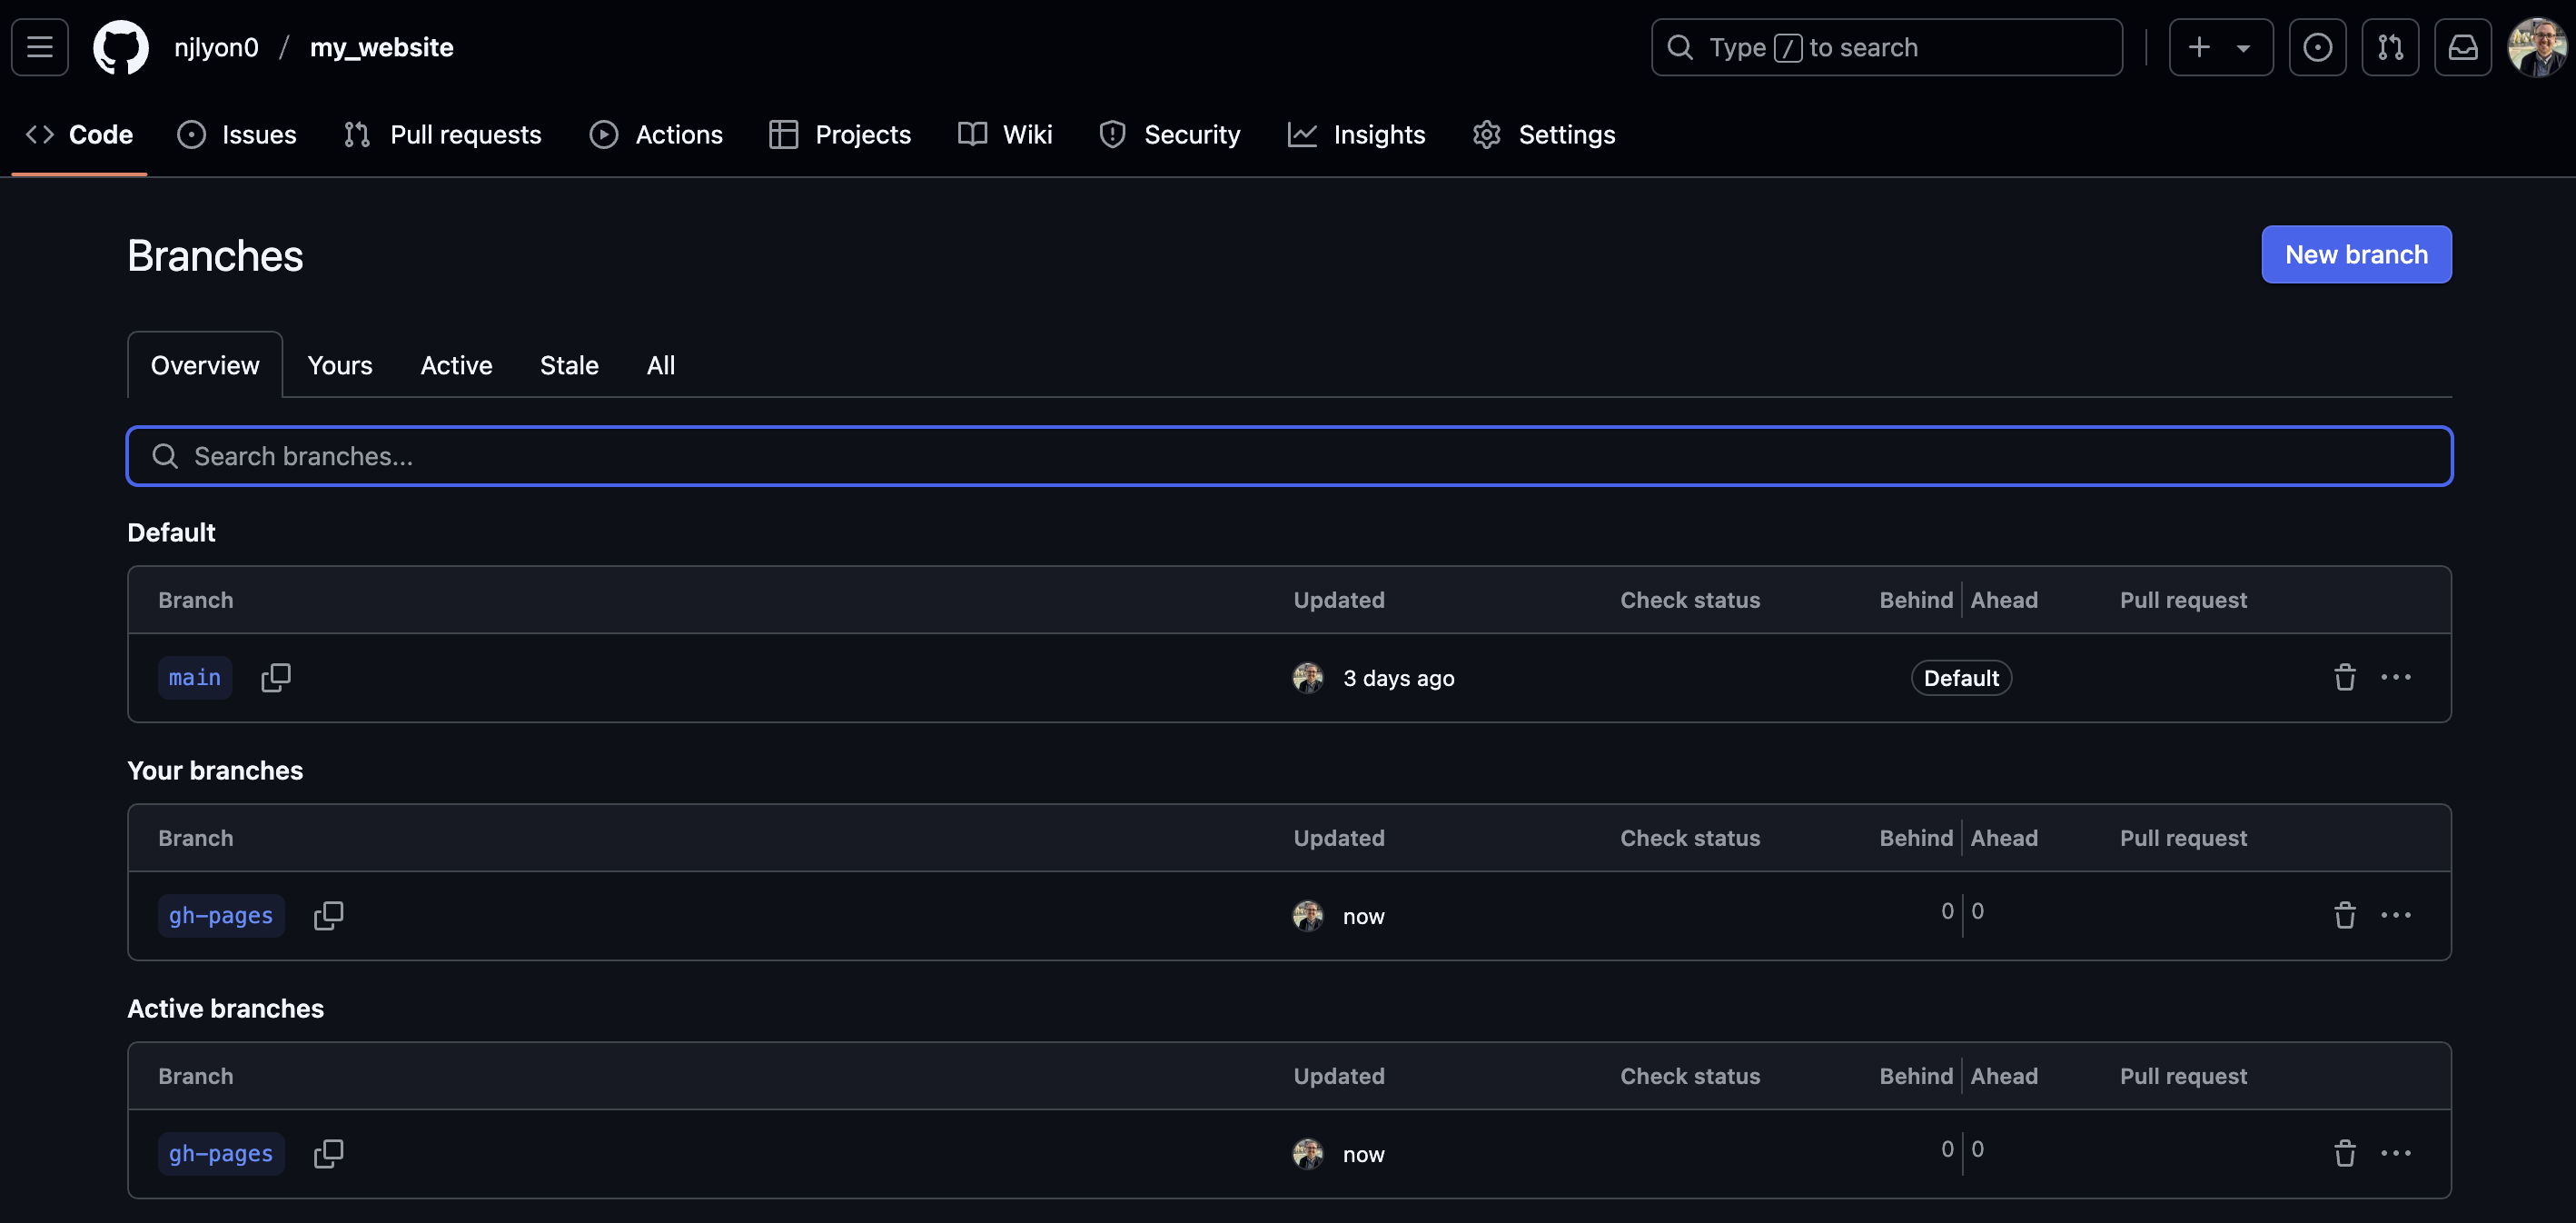
Once you’ve done that, the pop-up window should close and you should find yourself back on the ‘branches’ page but there will now be two active branches: your default starting branch and “gh-pages”!
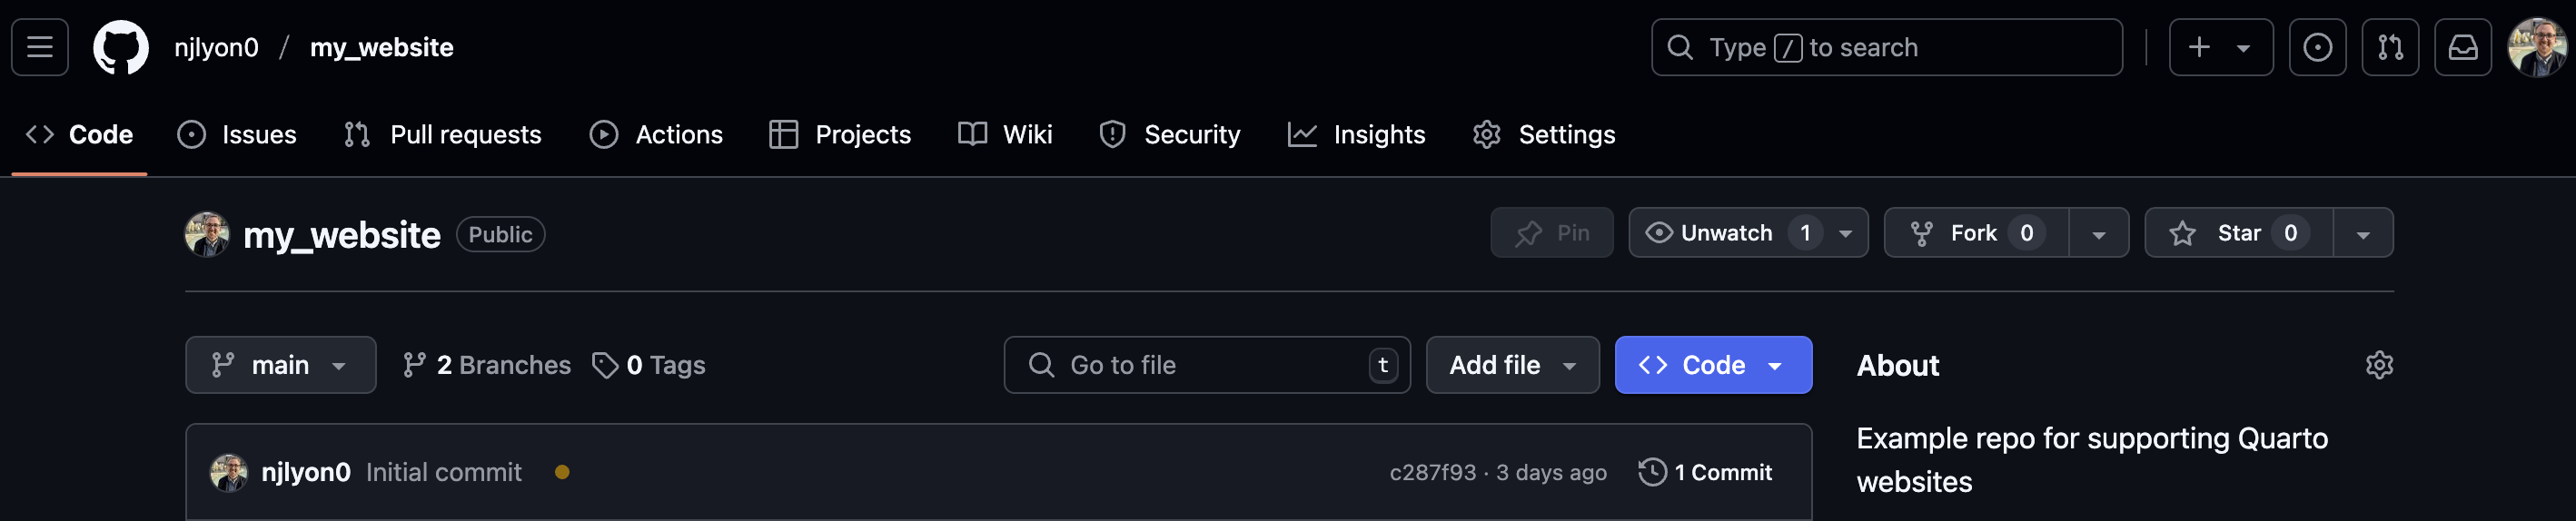
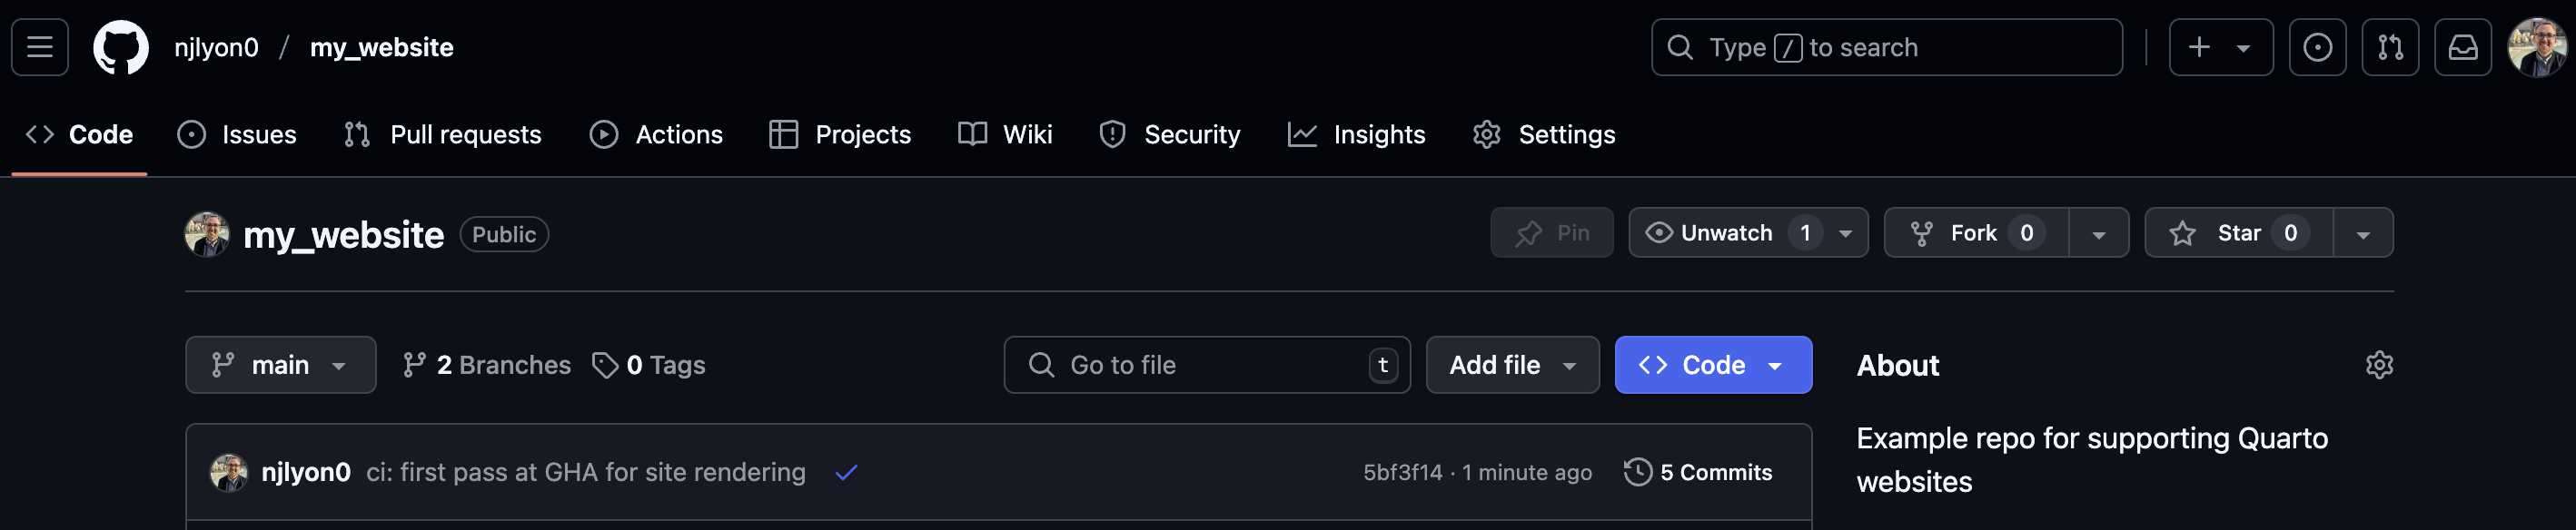
You can now return to your repository’s landing page. You may see an orange circle or a check mark that is either blue or green next to the most recent commit message but we can safely ignore this for now.
4 Clone that Repository
Now that you have created a repository on GitHub, we need to clone it locally so we can create the content we want in our IDE. This workshop assumes that you have some familiarity with the cloning workflow already so it is not recapitulated here.
5 Create Core Website Skeleton
Now that the GitHub repository is correctly set up, we have a “gh-pages” branch, and its all nicely cloned to your local computer, we can create the files that serve as the core website architecture.
Click through the tabs below–in order–to create the fundamental structure for your website.
Open your .gitignore file and add the following lines to the bottom. These are folders that Quarto needs to locally render your files but that we don’t want to track with Git.
# Quarto folders
/.quarto/
docs/
NoteOther Good .gitignore Additions
You might also consider adding the following to your .gitignore. This well help keep your repository free of unneeded contents as the website grows.
# R Project
*.Rproj

# Mac files
.DS_Store
Make a new file named exactly “_quarto.yml” (all lowercase, starting with an underscore). This file is your website’s global YAML and will define website-wide behavior.
Once you have this file, click the collapsed menu below and copy/paste all of its contents into your empty _quarto.yml file.
Feel free to edit this part! It defines the website title that appears on the left side of the navbar with Quarto.
2
Change this link to your GitHub repository’s link
3
Edit this link to the same destination as #2
4
Change this to be the current year and your name
Once you have that file, update the following:
The two lines that link to a GitHub repository
Should be the link to the repo you just made
The copyright holder
Should be your name
Optionally, the website title
Make a new file named exactly “index.qmd” (all lowercase). This file will become your website’s homepage. For right now, you don’t have to add anything to this file, but if you’d feel more comfortable adding something, go ahead and add the following.
---title:"My Website"---## Under ConstructionCheck back later!
6 Test it Locally
To make sure that everything is set up properly so far, it is good practice to create the website on your computer (i.e., “locally”) before continuing. We can do this by running the following command line snippet.
quarto preview
This should create a new tab in your default browser application that shows a living version of what your website will look like after GitHub starts hosting it. The preview will keep going until you manually stop it (from the Terminal pane with the Ctrl + C keyboard shortcut) so feel free to make tweaks to either _quarto.yml or index.qmd while the preview is running. The preview will update a few moments after you save your edits to either of those files.
7 Render the Website
Once you’re happy with the preview, it’s a good call to completely render the website just to make sure all of your most recent edits are reflected. You can do this with the following command line code.
quarto render
This may create a docs/ folder and a _freeze/ folder depending on whether you have code chunks in index.qmd (or anything else requiring computation). docs/ will show up in your file explorer but not the area reflecting Git because of how you expanded the .gitignore earlier. _freeze/, on the other hand, should show up in both locations if it is created during rendering.
7.1 Commit & Sync
Once you’ve done the preceding steps, commit everything that the above instructions directed you to make or edit. After you’ve committed these, push/sync them to the GitHub repository!
8 Deployment Options
While you created the structure and content of a website earlier in this workshop, you will need to take some additional steps in order to get the website to really exist. This process of translating a Quarto project into a living website is known as “deploying” that website. There are many options for where a website can be deployed but for the purposes of this workshop, we’ll be focusing on deploying via GitHub Pages.
We’re focusing on deploying via GitHub Pages because:
General GitHub knowledge translates smoothly to GitHub Pages
Websites hosted in GitHub can be edited directly through GitHub
Reducing the barrier to entry for novice coders interested in editing an existing website
We have already encouraged the adoption of GitHub for many other purposes
Once you’ve chosen to deploy via GitHub Pages, there are still several methods for successfully deploying! The instructions in this workshop use a GitHub feature called a “GitHub Action” (GHA) because this allows GitHub to automatically re-render and update the website whenever changes are made to any part of the website’s content.
This is a huge benefit for website updating because it reduces the need for manual “rendering” of website files locally and makes it simpler to maintain the website in the long term. Additionally, it also allows many pages in the website to be edited directly through GitHub (because rendering can be done online rather than needing to be done locally).
GitHub supports GHAs for a wide variety of automation purposes beyond website rendering (e.g., running tests on new code, checking compatibility with multiple operating systems, etc.) but the website rendering functionality is a great entry point into the world of GHAs if you do not already use them in your work on GitHub.
Another benefit of this approach is that GitHub Actions are free for public repositories! So you can host a personal, lab, or project website through GitHub without needing to pay anything.
10 Set Up the Deployment GHA
10.1 Create the GHA YAML
Because we created a “gh-pages” branch when we first made the repository, all that we need to do to start our GHA is to create the YAML file that tells GitHub what action we want it to perform. GitHub requires that this file be called “publish.yml” and be at the following path within your website repository: .github / workflows / publish.yml. Note that the .github/ folder name starts with a period!
Once you have this file, click the collapsed menu below and copy/paste all of its contents into your empty publish.yml file.
publish.yml Contents
on: workflow_dispatch: push: branches: mainname: Quarto Publishjobs: build-deploy: runs-on: ubuntu-latest permissions: contents: write steps:- name: Check out repository uses: actions/checkout@v3- name: Set up Quarto uses: quarto-dev/quarto-actions/setup@v2- name: Render and Publish uses: quarto-dev/quarto-actions/publish@v2 with: target: gh-pages env: GITHUB_TOKEN:${{ secrets.GITHUB_TOKEN }}
Do not commit or push/sync this file yet! We’ll get to that in a moment.
10.2 Tweak GitHub Repository Settings
Before we can push our GHA file, we need to change one setting in your GitHub repository. Do the following:
Go to your GitHub repository’s landing page
Click “Settings”
Select “Pages” from about halfway down the left sidebar
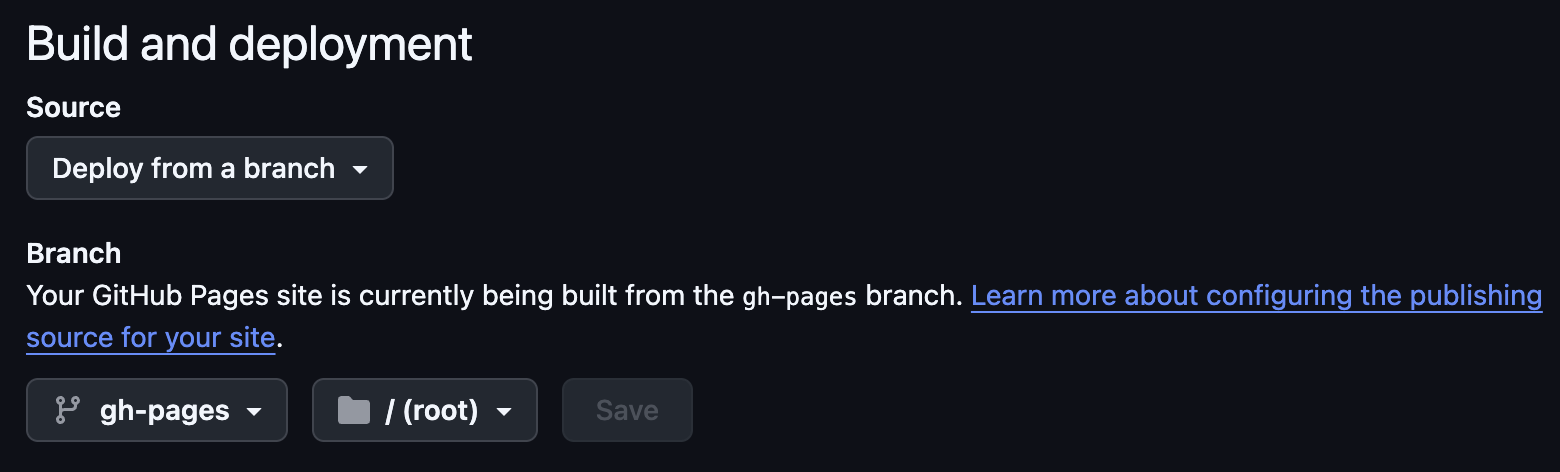
Make sure your “Build and deployment” section looks exactly like the image below
10.3 Push the GHA YAML
Once you have created “publish.yml” (in the correct folder) and put the necessary stuff into it, commit that file and push it! You may want to run the quarto render CLI code again if you’ve edited other website files since your last push/sync.
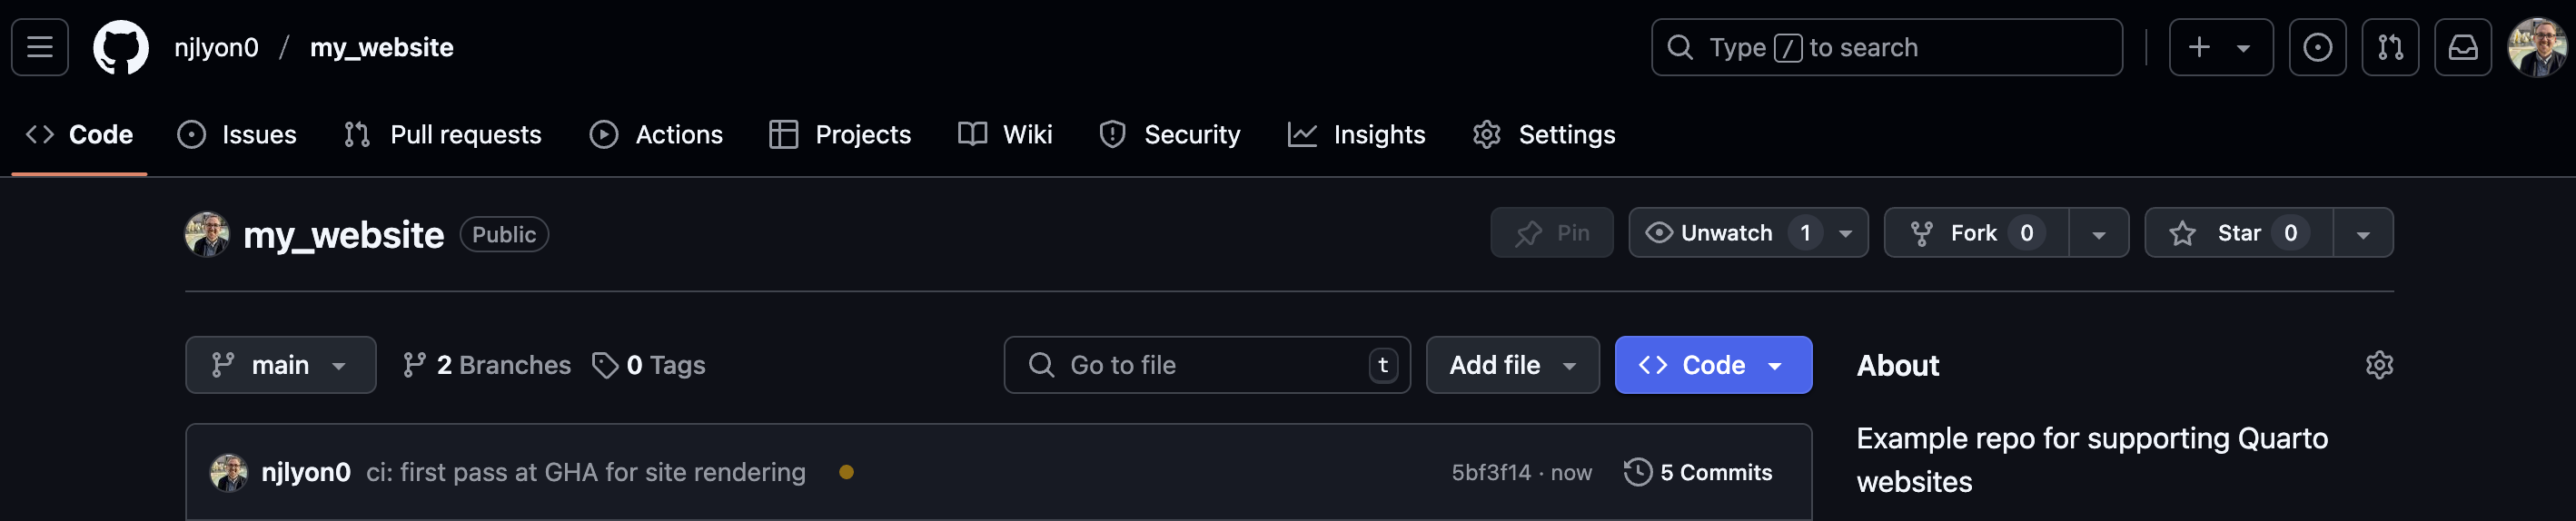
Once you’ve pushed the “publish.yml” file, return to your repository landing page and you should see an orange circle next to that commit message.
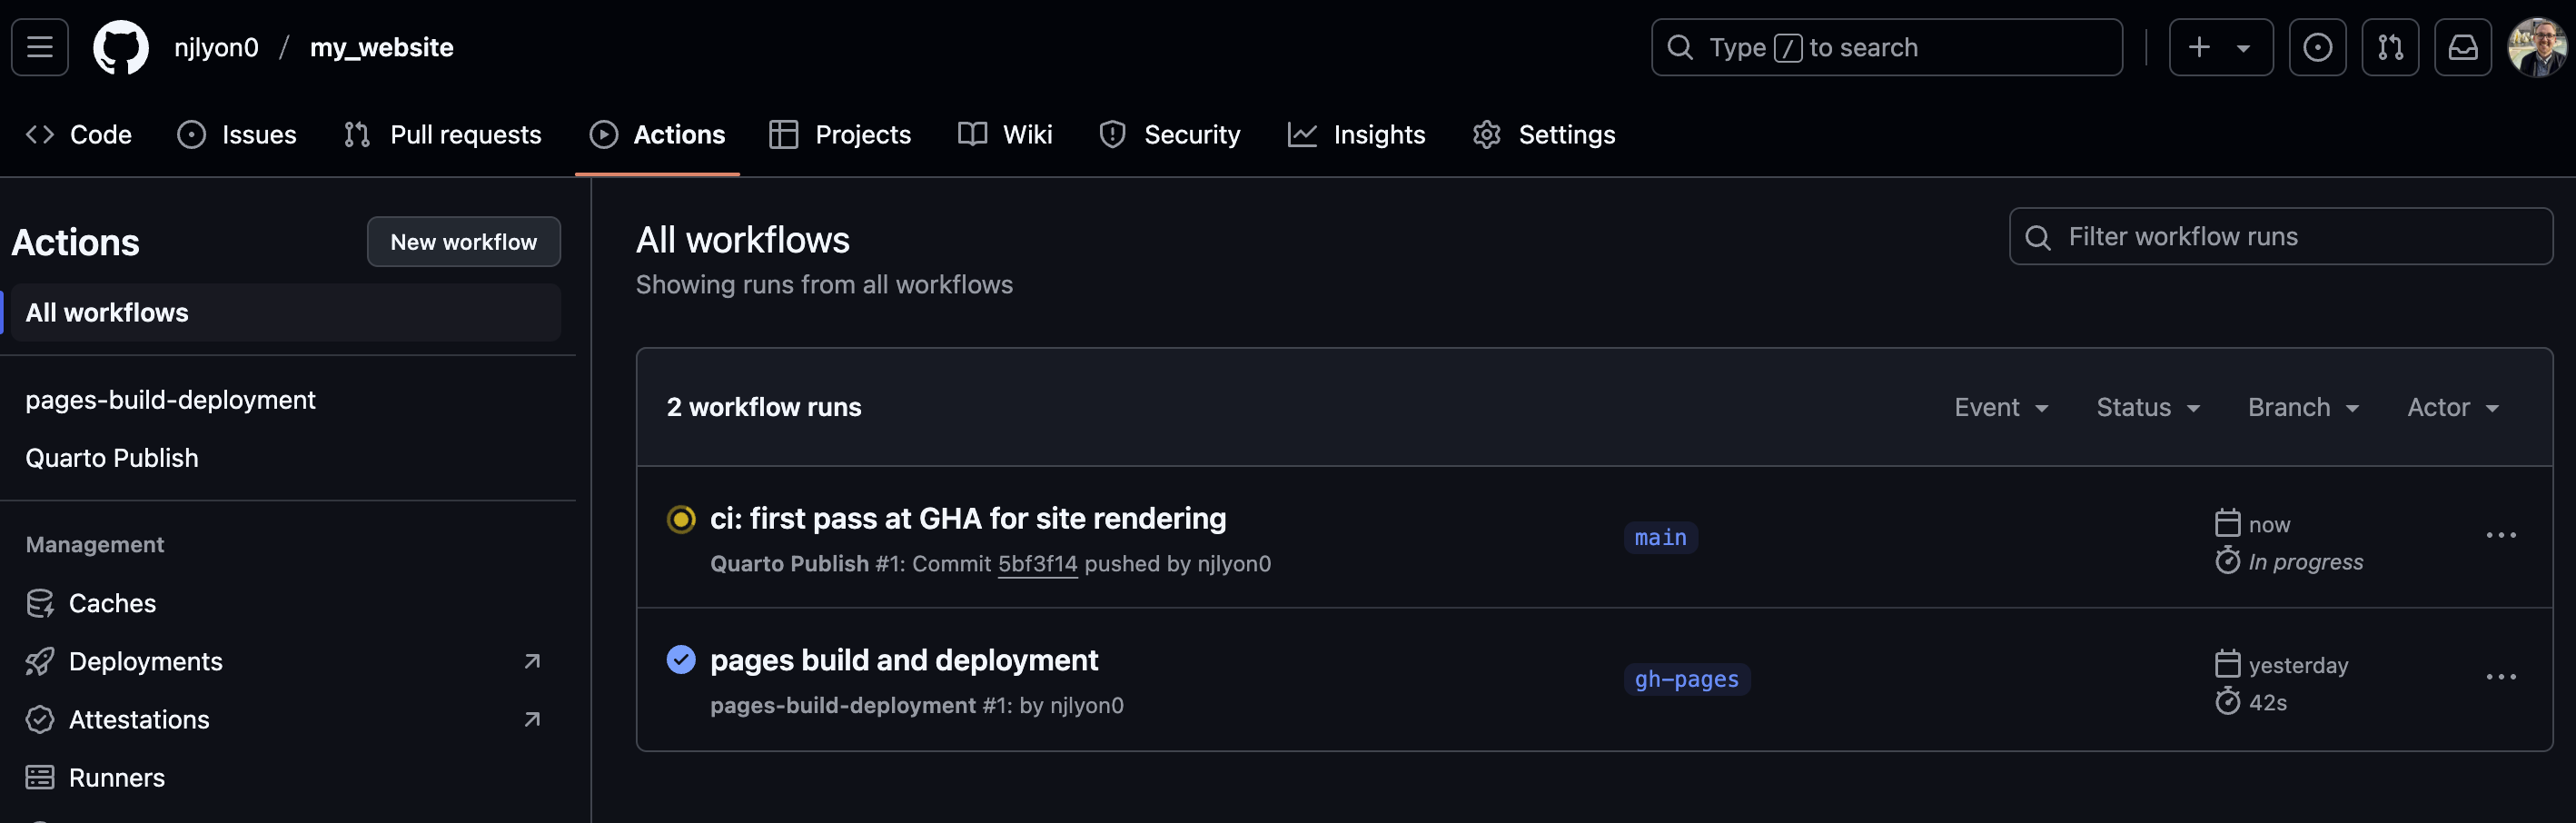
If you click the “Actions” tab at the top of the repository’s landing page you can get more specific information about the GitHub Action’s progress.
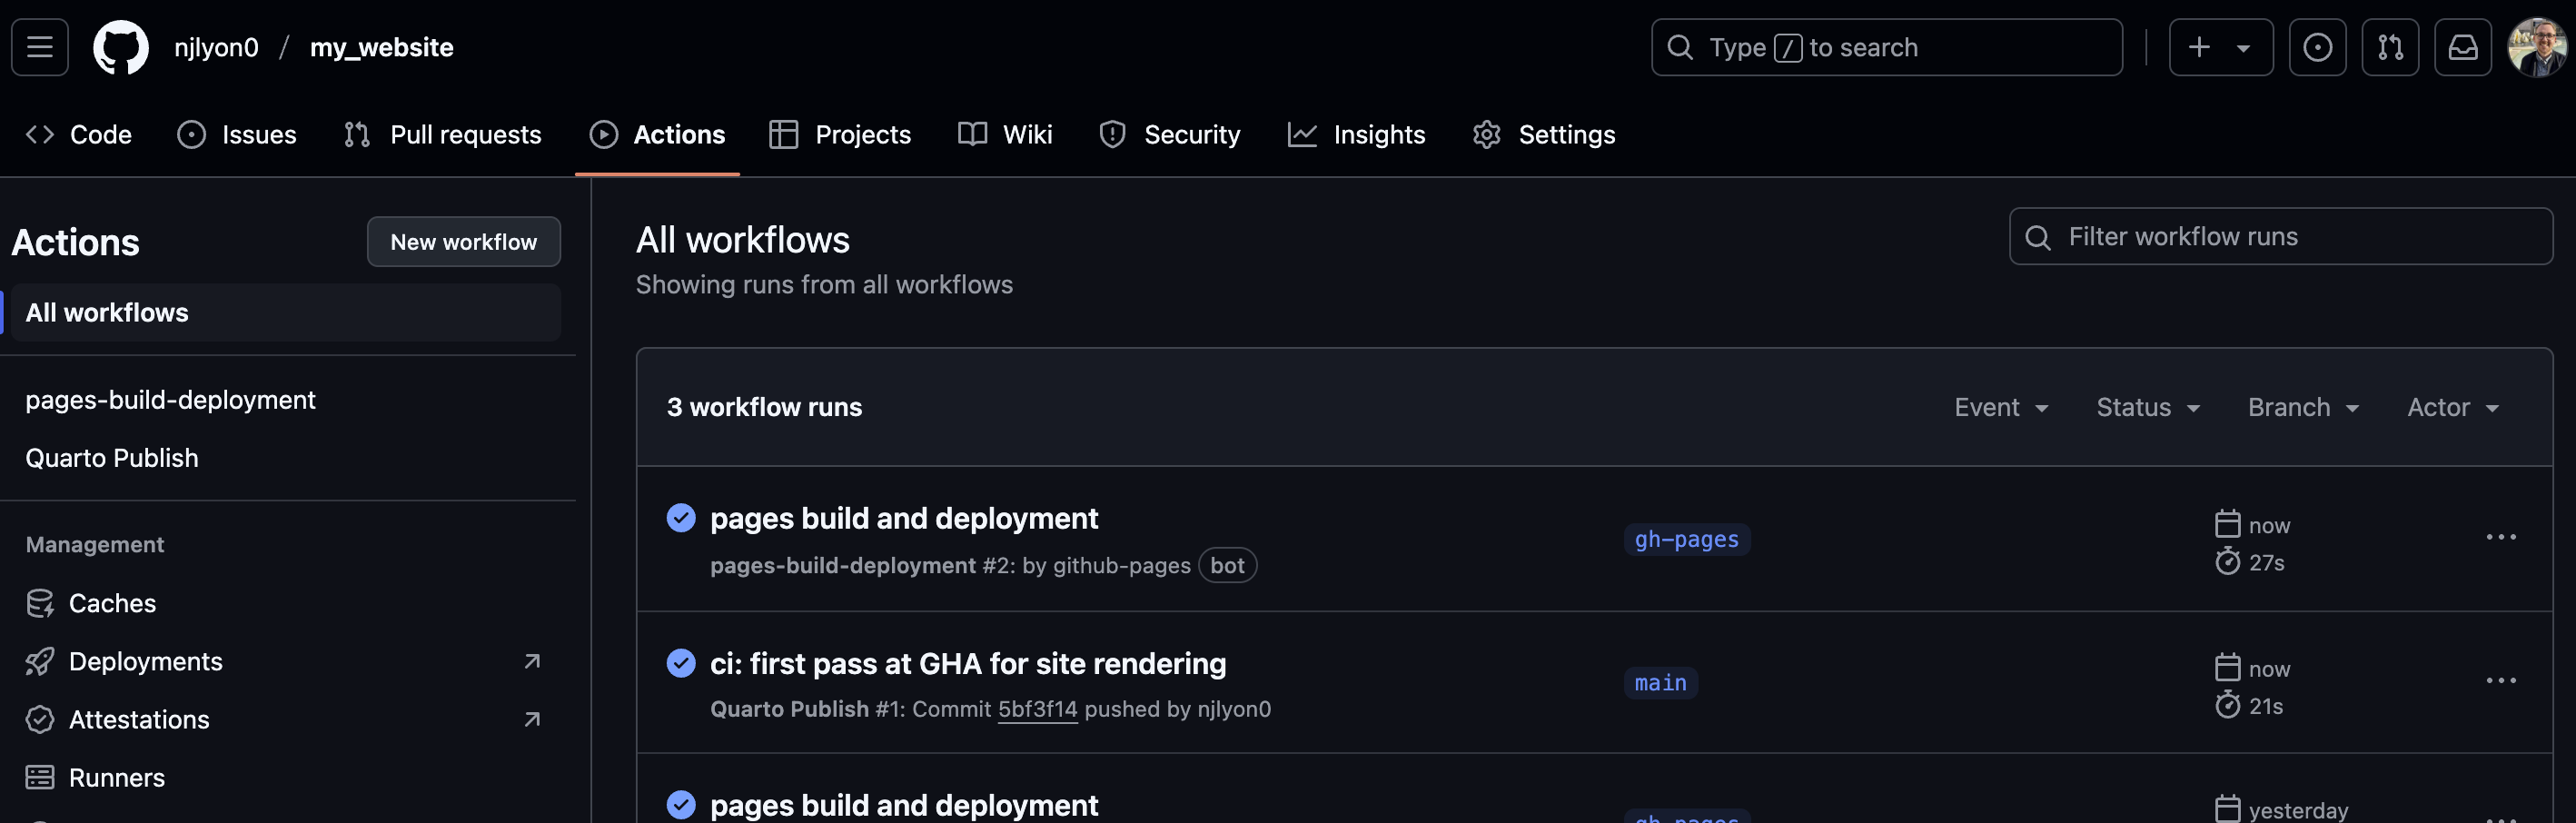
At first, there will be a progress circle next to a “workflow run” that has the same name as the most recent commit. When that finishes it will be replaced by a check mark. Once this finishes, a new action called “pages build and deployment” will automatically start. Once that action is done, you should have an updated website!
If you don’t want to watch the actions complete from the “Actions” tab, you can check their status from the repository landing page; a circle means one of those actions is in progress and a checkmark indicates they are finished.
11 GitHub Housekeeping
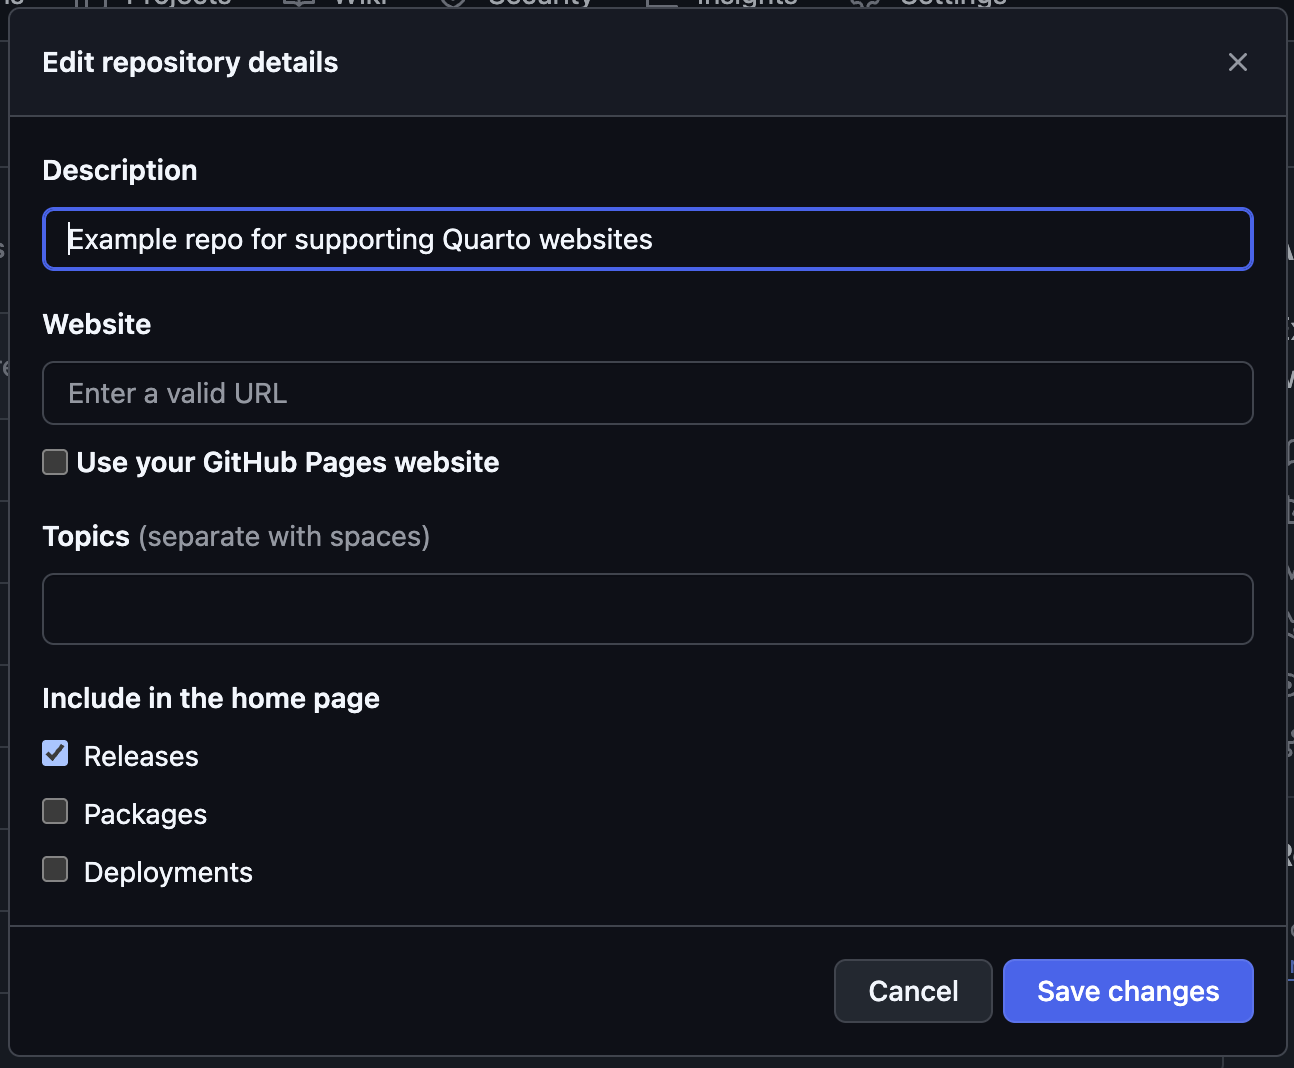
After the GitHub Action completes, your website is live but you’ll need to take an extra step to make that link directly-accessible from the landing page of the repository. To start click the gear () icon next to “About” in the right sidebar of the repository.
In the resulting pop-up menu, check the box for “Use your GitHub Pages website” under the “Website” field. Feel free to customize the other fields however you’d like! When you’re done, click the “Save changes” button to close this menu and update your “About” sidebar.
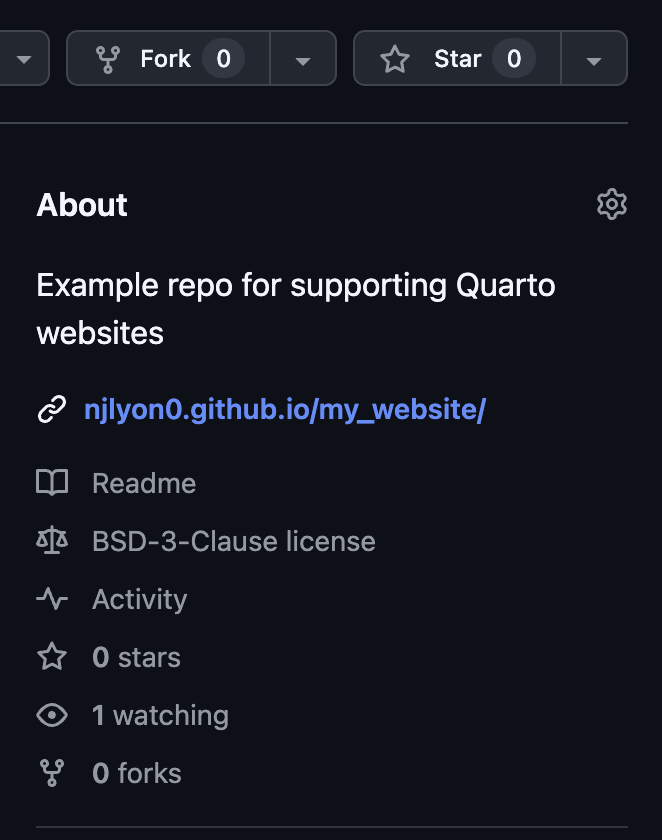
You should now see the website in the “About” sidebar of the repository!
12 Create a New Page
Once you have a working website, adding content is straightforward! On your local computer, work through the following steps.
12.1 Make a Quarto File
Each new page requires a new file. Go ahead and create a new Quarto file. When you save it, keep in mind that the repository-name-to-website-URL relationship will also affect the link to this specific page. Check out the example below for one way of visualizing this relationship.
If you do not use sub-folders, the same relationship would occur just without the “folder” part. The take-away of the above is essentially that you should save this Quarto file with a brief name that is descriptive of this page’s purpose in your website.
12.2 Update the Global YAML
For this new page to show up in your website, you need to edit your “_quarto.yml” file so that Quarto knows where your page should be linked (e.g., in the navbar, in a dropdown menu, etc.). To do this:
Open your “_quarto.yml”
Add the new Quarto file to the relevant place
If you’re unsure, just add it beneath the line that references “index.qmd”
WarningWatch Out for Indentation!!
While indentation does not affect R code, it absolutely affects YAML code! A common source of error for Quarto websites is improper indentation for a new YAML element so double check the indentation of your additions against comparable rows that you know already work.
12.3 Test it Locally
To make sure that your new page displays as you desire, run quarto preview and make sure your website looks how you want it to. If it doesn’t, edit the offending file(s), save those edits, and look at the preview again.
WarningRemember to End the Preview When Done!
The preview will keep going until you manually stop it so be sure to stop it when you’re ready to move on.
12.4 Render & Push
Once you’re happy with how the preview looks:
Run quarto render
Commit & push/sync all changed files related to the new page
Wait for the GHA to complete
The process for the GitHub Action is the same as it was when you first deployed your site so you can either watch the symbol on the repository landing page or get more granular information in the “Actions” tab of the GitHub repository
WarningSite Not Updating? Refresh the Page!
If your site is not updating but you’ve followed the above steps (and the GitHub Action is finished), you might try closing the page and re-opening it or refreshing the page. Sometimes it takes a moment for updates to the site to be visible if you opened the page before the GitHub Action is complete or as it completes and refreshing the page can fix it in this case.
13 SCSS Background
Technically, when we render a Quarto project we are asking Quarto to convert the .qmd file into .html and apply a CSS (Cascading Style Sheets) stylesheet. This is why your deployed website up to this point has had a blue navbar, a white background, and black text (to name a few theme elements governed by the implied CSS stylesheet).
Quarto supports us making our own, customized stylesheets with Sass (Syntactically Awesome Stylesheet) to tailor the look and feel of our website to exactly our personal preference. The relevant file type is .scss (Sassy CSS; still pronounced “sass”). These files can be written in a combination of CSS and Sass so the syntax might look a little alien to you but this workshop will try to provide a useful level of practical detail for you to engage with these stylesheets even if this is your first foray into that world.
NoteR Versus SCSS Comparison
If you’re an R coder, it might be helpful to compare how R assigns values to objects versus how SCSS binds values to variables as well as how to write a comment (i.e., a non-coding line).
R code
# Comment
object <- value
Sass code
// Comment
$object: value;
14 Customize the Website with Sass
14.1 Create Sass Stylesheets
Create two new files: “theme_light.scss” and “theme_dark.scss”. This will let us easily create a light mode and a dark mode for our website so that visitors can click a toggle in the navbar to choose their desired aesthetic.
Once you have these files, click the collapsed menu below and copy/paste all of its contents into both empty SCSS files.
SCSS Contents
/*-- scss:defaults --*/// Colors/* Found on https://coolors.co/palettes/trending */$org-1:#ff9f1c;$org-2:#ffbf69;$mint-1:#2ec4b6;$mint-2:#cbf3f0;$url-blue:#4361ee;/* generally useful other colors */$cream:#F4F3EE;$charcoal:#191919;$gray-1:#8A817C;$gray-2:#BCB8B1;$gray-3:#d6d6d6;// Fonts$font-size:25px;@import url('https://fonts.googleapis.com/css2?family=Open+Sans:ital,wght@0,300..800;1,300..800&display=swap');// Base document colors$navbar-bg:$org-1; // navbar$navbar-fg:$charcoal; // navbar foreground elements$navbar-hl:$org-2; // highlight color when hovering on a page$sidebar-bg:$org-2; // sidebar$sidebar-fg:$charcoal; // sidebar foreground elements$body-bg:$cream; // page background$body-color:$charcoal; // page text$footer-bg:$mint-1; // footer$footer-fg:$charcoal; // footer text$link-color:$url-blue; // hyperlinks// Code text$code-bg:$gray-2; // inline code background color$code-color:$charcoal; // inline code text color$code-block-bg:$gray-2; // code block background color/*-- scss:rules --*/// Underline URLs.reveal .slide a { text-decoration: underline; }// Improve background contrast for code chunk ouputpre code:not(.sourceCode) { background-color:$gray-2; }// Improve contrast for tabset panels.nav-tabs .nav-link.active { background-color:#FFF; color:$black;}.tab-content { background-color:#FFF; }
This will result in your light and dark mode being identical to start with but that’s okay because this method makes sure that the format of both SCSS files is correct.
14.2 Integrate Into the Website
To get your website to use these .scss files, we’ll need to make some minor edits to the website’s YAML. Open your “_quarto.yml” file in your IDE and add the following lines.
WarningPaste in the Right Place!
Note that the below code chunk includes a html: element but your existing _quarto.ymlwill already have that element! That bit is included below so you know where to copy/paste the new lines into your existing YAML.
If you’re using a mostly unmodified _quarto.yml, this will be about 4 lines up from the very bottom.
  html:
    theme:
      light: theme_light.scss
      dark: theme_dark.scss
    mainfont: Open Sans
Double check that your indentation is right after you copy/paste those lines!theme: and mainfont should both be one indent more than html: while light: and dark: should have an additional indent beyond theme:.
14.3 Customize to Your Taste
The Sass code you copy/pasted is functional and inoffensive but likely does not reflect your personal aesthetic sensibilities. So, take some time to find some colors that you prefer. This is also a great time to make your dark mode actually a dark mode (currently it has the same content as the light mode .scss file).
To find new colors, visit coolors.co and look at their trending color palettes for one that feels like your vibe. To incorporate that in your site you’ll need to copy the hexadecimal code (6-digit color code) and add it to the relevant .scss file.
Typically the simplest way to do this is to assign each color to a variable name, just like the default colors you copy/pasted in earlier (e.g., $cream: #F4F3EE;). Be sure that each line starts with a $ and ends with a ;.
Once you’ve assigned variable names to your new color(s), update the existing fields in the lower half of the .scss file with those variable names. Consult the comments for some explanation of what those variable names are called. Remember too that each variable name needs to start with $ when you invoke it (so that Sass knows you’re talking about an existing variable).
To find new possible fonts, check out Google Fonts (fonts.google.com) and search around for one that seems like a good fit for your personal style. When you have identified a font that you like, follow these instructions:
Click on the font to go to its homepage
Click the blue “Get font” button in the top right corner of the page
Click the blue “ Get embed code” button
Click the @import radiobutton in the top of the resulting sidebar
In the first code chunk, copy everything between the two <style> HTML tags
In your .scss files, paste the copied text somewhere near the font that is already there to begin with
Finally, update the mainfont: element of _quarto.yml with the new font name
14.4 Test it Locally
To make sure that your new website displays correctly, run quarto preview. If it doesn’t, edit the offending file(s), save those edits, and look at the preview again.
This step can be especially critical when fiddling with (yes, that’s the technical term ) colors for your website. Use the preview extensively to be sure you’re happy with your chosen color palette.