Practice how to set up GitHub Authentication using a Personal Access Token (PAT)
Clone the course repo to RStudio
Create a branch and open a Pull Request (PR) as the submission mechanism
1 Set up global options in Git
Before using Git, you need to tell it who you are, also known as setting the global options. You can do this either on the terminal using git command or in the console using the R package usethis. For this lesson we will use the usethis package. However, you can also find the git commands to reference in the future.
You need a GitHub account!
You can use Git on your computer to do your own version control, but if you want to interact with other people (like your instructors), you will use Git together with a Cloud Storage Service, like GitHub.
If you already have a GitHub account, please note your Github username and password.
If you don’t have a GitHub account, sign up now!
https://github.com
What’s the Terminal?
Technically, the Terminal is an interface for the shell, a computer program. To put that simply, we use the Terminal to tell a computer what to do. This is different from the Console in RStudio, which interprets R code and returns a value.
You can access the terminal through RStudio by clicking Tools > Terminal > New Terminal.
A Terminal tab should now be open right next to the Console tab.
Don’t be afraid to dip your toes in the Terminal
Most of our Git operations will be done in RStudio, but there are some situations where you must work in the Terminal and use command line. It may be daunting to code in the Terminal, but as your comfort increases over time, you might find you prefer it. Either way, it’s beneficial to learn enough command line and to feel comfortable in the Terminal.
2 You’ll need to join the GitHub Classroom
Click this link and accept the assignment to create your private repo (repository):
Add your exact same GitHub user name. Case and spelling matters!
2
Set up your email address associated to you GitHub account.
3
Setting “merge” as the default strategy to integrate changes from one branch into another branch (for all repos). Check the note at the end of this chapter for more details.
Step 2: define the name of the branch that gets created when you make the first commit in a new Git repo
Step 2: define the name of the branch that gets created when you make the first commit in a new Git repo.
git config --global init.defaultBranch main
Step 3: check to make sure everything looks correct.
The following command return the global options you have set.
git config --global--list
Case and spelling matters!
When you add your username and email to the global options you must use the exact same spelling and case that you used on GitHub otherwise, Git won’t be able to sync to your account.
Why set the default branch name to main?
Previously, the default branch name was master and this terminology for Git branches invokes slavery, which motivates us to update our default branch to main instead.
4 GitHub Authentication
GitHub recently deprecated password authentication for accessing repositories, so we need to set up a secure way to authenticate.
We will be using a Personal Access Token (PAT) in this course. For better security and long term use, we recommend taking the extra steps to set up SSH keys (check out Chapter 10 Set up Keys for SSH).
Setting up your PAT
Run usethis::create_github_token() in the Console.
A new browser window should open up to GitHub, showing all the scopes options. You can review the scopes, but you don’t need to worry about which ones to select this time. The previous function automatically pre-selects some recommended scopes. Go ahead and scroll to the bottom and click “Generate Token”.
Copy the generated token.
Back in RStudio, run gitcreds::gitcreds_set() in the Console.
Paste your PAT when the prompt asks for it.
Last thing, run usethis::git_sitrep() in the Console to check your Git configuration and that you’ve successful stored your PAT. Note: look for Personal access token for 'https://github.com': '<discovered>'
If you see <unset> instead of <discovered> means your PAT is not correctly set. You need to troubleshoot.
Congrats! Now you’ve setup your authentication you should be able to work with GitHub in RStudio.
5 Clone your GitHub Classroom repo into RStudio
After authentication:
In GitHub, open your repo and copy the HTTPS URL (maybe it’s already in your clipboard).
It should look something like: https://github.com/SFSUdatasci/import-template-nadelstein
In RStudio: File → New Project → Version Control → Git
Paste URL for the GitHub Classroom repo
Choose the directory (folder) where to save on your computer
Click “Create project”
In the Files tab (left panels), click on index.qmd
Click Render, on the navigation bar above the index.qmd file, which confirms local setup if an html opens in a browser.
Fix a problem with the code!
When we set up the GitHub Classroom, we had an error, which is causing GitHub to try to render your qmd files. We need to fix it.
In RStudio, open the file from your repository .github/workflows/render-quarto.yml
Under line three “on:”, remove lines 4 and 5 that say:
To submit an assignment, you’ll use GitHub and this workflow:
Create a branch: a00, a01, a02, etc. (Today make a00 as our test!)
In RStudio, look for the Git tab (usually upper right pane)
Click the purple branch icon with two branches
Name it (for example a01 next time)
Make sure the “Sync branch with remote” is checked
Click “Create”
Create assignment
If today’s test assignment, or the first graded assignment, open assignments/a00.qmd or assignments/a01.qmd
Else, in RStudio, File → New File → Quarto Document (or R Markdown)
Save it as a0*.qmd in the assignments/ folder
Commit your changes with a meaningful message
In the Git tab, check the box next to assignments/a0*.qmd [some people are having trouble with this and can only see the a00.html file, so just submit that for now]
Click “Commit”
Write a commit message (e.g. “Add assignnment a00”)
Click “Commit”
Push branch to GitHub
Click the green “Push” arrow in the Git tab
Open a Pull Request (PR) into main branch
Go to your repository on GitHub in your browser
You’ll see a banner about your recent push with a “Compare & pull request” button
Click the button to create the pull request
Confirm the GitHub Action render check passes (green)
You might see the GitHub printing lots of lines of code, as its installing R. We are eventually going to fix that…
That’s it! RStudio’s Git integration makes this more straightforward once you get the hang of it. We’ll discuss what these steps really mean next week.
Try it out (TL-DR)!
Create a branch: a00
Edit assignment
For this test, edit the Quarto document named assignments/a00.qmd
Put in some new text or try out some R code
Commit your changes with a meaningful message, like “assignment submission test”
Push branch to GitHub
Open a Pull Request (PR) into main branch (from GitHub browser)
Confirm the GitHub Action render check passes (green)
One final technical note: we’ll use merge (not rebase) as the default strategy.
Above we configured our global options for all the repositories you create in your server session to use pull.rebase = "false" as the strategy to integrate changes from two branches. With this we are saying to merge changes (as opposed to rebasing).
It is important to highlight that this configuration can be repo specific. This means, you can configure how you want git to reconciling two branches at a repository level and not “for all repositories”. Allowing you to control on how git weaves things in when collaborating with others.
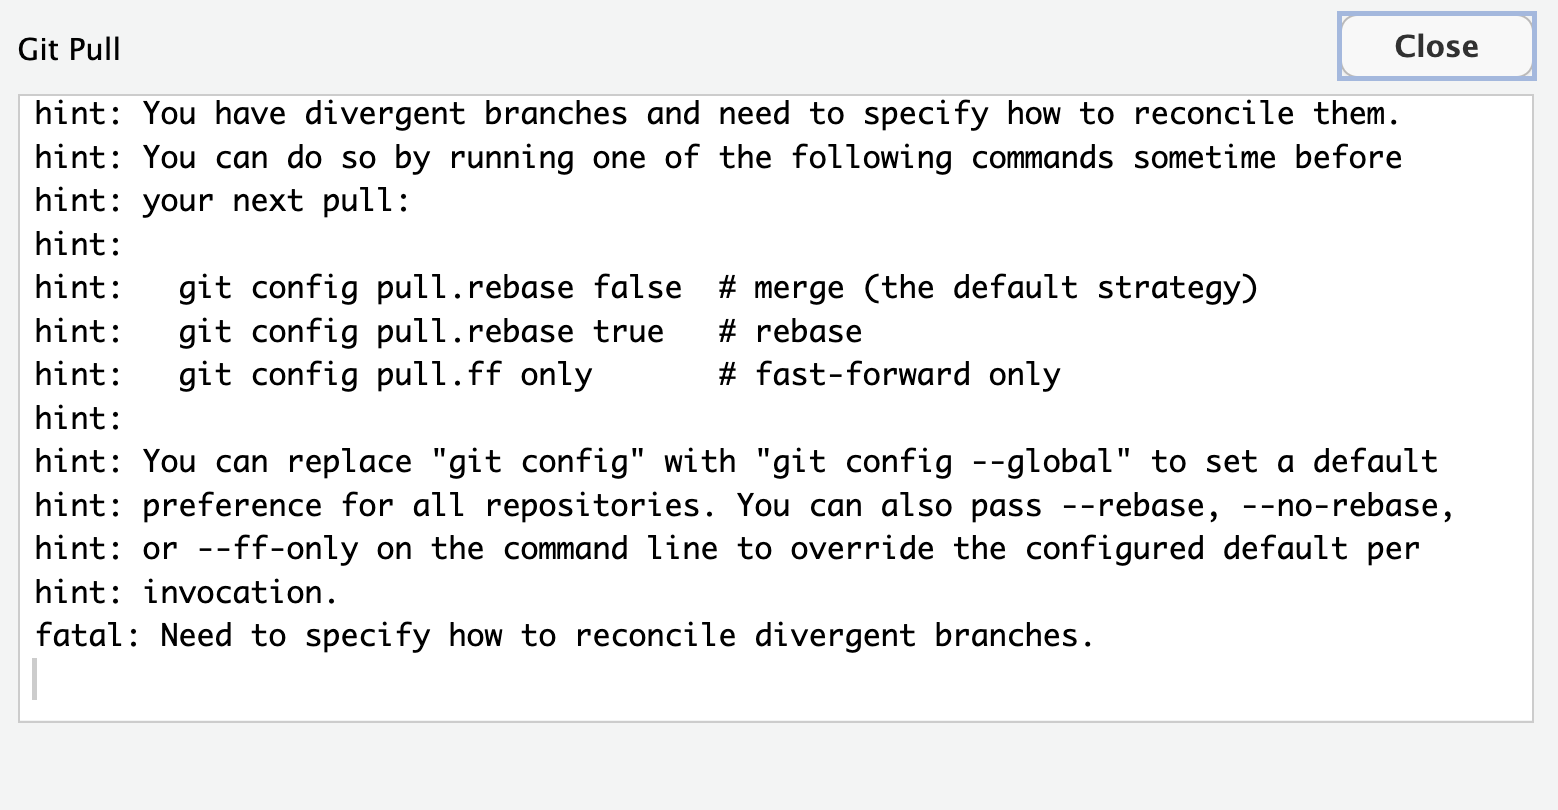
If you don’t define pull.rebase = "false" when setting the global configurations, you will have to define this for each repository you create. You will likely see the following message after you pull, meaning you have not define how to reconciling two branches in your repository.
To solve this issues you have to run either of the two suggested strategies on the terminal.